Embroidery for Beginners: Easy Projects to Get Started
Contents
- 1 Essential Embroidery Stitches Every Beginner Should Know
- 2 Best Starter Projects for New Embroiderers
- 2.1 Simple Monograms for Personalization
- 2.2 Flower Hoops for Decorative Touches
- 2.3 Everyday items with embroidered accents
- 2.4 Decorating Kitchen Towels
- 2.5 Personalizing Tote Bags
- 2.6 Seasonal Embellishments for Timely Practice
- 2.7 Christmas Ornaments
- 2.8 Fall Leaf Garland
- 2.9 Tracking Progress with Sampler Projects
- 2.10 Creating Your Sampler
- 2.11 Incorporating Patterns
- 3 How to Set Up Your First Embroidery Hoop
- 4 Tips for Keeping Your Stitches Neat & Even
- 5 FAQ
- 5.0.1 Can embroidered clothes go in the washing machine?
- 5.0.2 Will embroidery floss bleed on fabric?
- 5.0.3 Can I bring hand embroidery needles and small scissors in my carry-on in the U.S.?
- 5.0.4 How much does a beginner embroidery kit cost in the U.S., really?
- 5.0.5 What’s the easiest way to transfer an embroidery pattern onto dark fabric without a lightbox?
Embroidery is a beautiful and rewarding craft that allows beginners to create stunning designs with a needle and thread. For those just starting out in this art form, the question arises of where to start – which stitches to learn, what materials to use, and what projects are best for practicing. This guide covers everything you need to know about embroidery for beginners, from mastering basic embroidery stitches to choosing the best fabric. By the end of this article, you’ll be able to download a checklist — a simple guide with beginner-friendly embroidery steps to start your creative journey.
Essential Embroidery Stitches Every Beginner Should Know
Mastering the basic stitches is especially important when you are just starting out in embroidery. These basic techniques serve as the foundation for all future projects, whether you are using embroidery kits for beginners or creating original designs. The right combination of basic embroidery stitches can transform simple fabric into a beautiful work of art.
Running Stitch
This is a fundamental technique in embroidery for beginners. It allows you to create fine dotted lines, ideal for outlines and fine details. When working with the best fabric for beginners, such as high-quality cotton or linen, the running stitch produces excellent results. To do it correctly, pass the needle through the fabric, insert it a short distance and repeat, keeping the distance between stitches even. Constant practice helps develop the muscle memory needed to complete more complex patterns.
Continuous Stitch
For creating continuous, unbroken lines, the technique proves indispensable in embroidery for beginners. This versatile basic embroidery stitch is great for lettering and crisp outlines. This type involves making an initial straight stitch, then bringing the needle in front of it before inserting it back into the end of the previous stitch. This method will give you clean, professional-looking lines that will enhance any design, especially when working with transferred embroidery patterns.
Satin Stitch
Satin stitch is a great way to fill in shapes with smooth, solid color. As one of the most useful basic embroidery stitches, it is ideal for creating leaves, petals, and other filled elements. A successful satin stitch requires placing stitches as close together as possible while maintaining an even tension on the fabric. Following the natural contours of your design helps achieve the best results. When learning how to transfer embroidery patterns to fabric, look for simple shapes to practice this essential filling technique.
French Knots
They add wonderful texture and dimension to embroidery projects, although they can be challenging for beginners. These decorative basic embroidery stitches are great for creating floral centers, textured accents, and other three-dimensional elements. The technique involves placing the needle in the desired location, wrapping the thread around the needle once or twice, and then gently reinserting it near the starting point. Practicing on scraps of the best beginner fabric helps build confidence before incorporating French knots into real projects.
Lazy Daisy
This technique completes our collection of essential basic embroidery stitches. It is especially valuable for creating floral patterns. This charming technique creates perfect petals and leaves with a distinctive looped look. Creating a lazy daisy involves forming a loop of your thread and securing it with a small securing stitch. Proper spacing ensures balanced, attractive floral motifs that enhance any beginner embroidery kit project.
As you learn embroidery for beginners, remember that consistent practice with these basic stitches develops the skills needed for more complex work. Starting with quality embroidery kits for beginners gives you great practice material, and learning how to transfer embroidery patterns opens up endless creative possibilities. Try to choose the best fabric for beginners to ensure successful results.
Best Starter Projects for New Embroiderers
Beginner embroidery should always start with simple, rewarding projects that build confidence and teach basic skills. Choosing the right embroidery kits and patterns for beginners is essential in developing a love for the craft.
Simple Monograms for Personalization
One of the best beginner embroidery projects for beginners is creating monograms. These single-letter designs allow you to practice basic stitches while creating personalized items.
Choosing an Initial
Start with your first initial, using a backstitch for crisp outlines. The best fabric for beginners, such as cotton or linen, is ideal for monograms. A common choice is to choose a design size that is about 3 inches tall. This will give you plenty of room to practice stitches, but will still allow you to work without straining yourself.
Choosing a Stitch
Satin stitch is great for filling in letter shapes, while backstitch creates crisp outlines. Beginners can experiment with combining these basic embroidery stitches to add dimension to their work. Many beginner embroidery kits include alphabet patterns to help transfer the design.
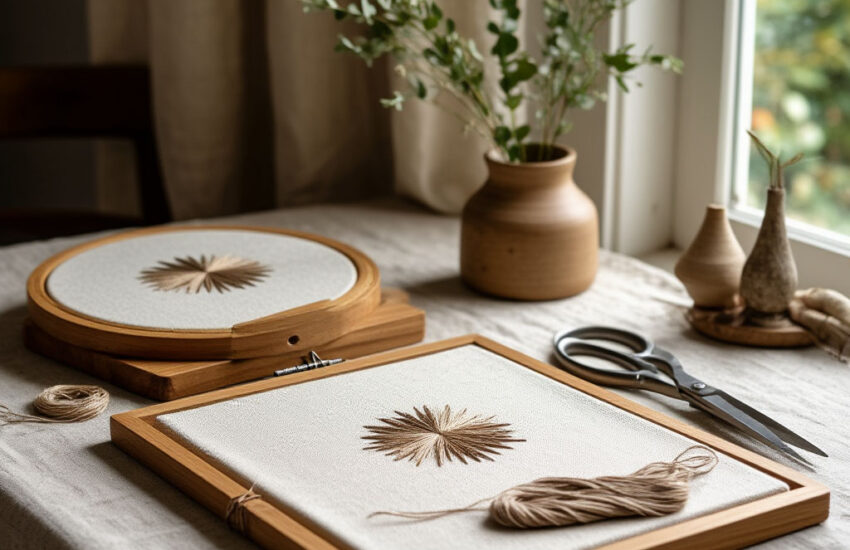
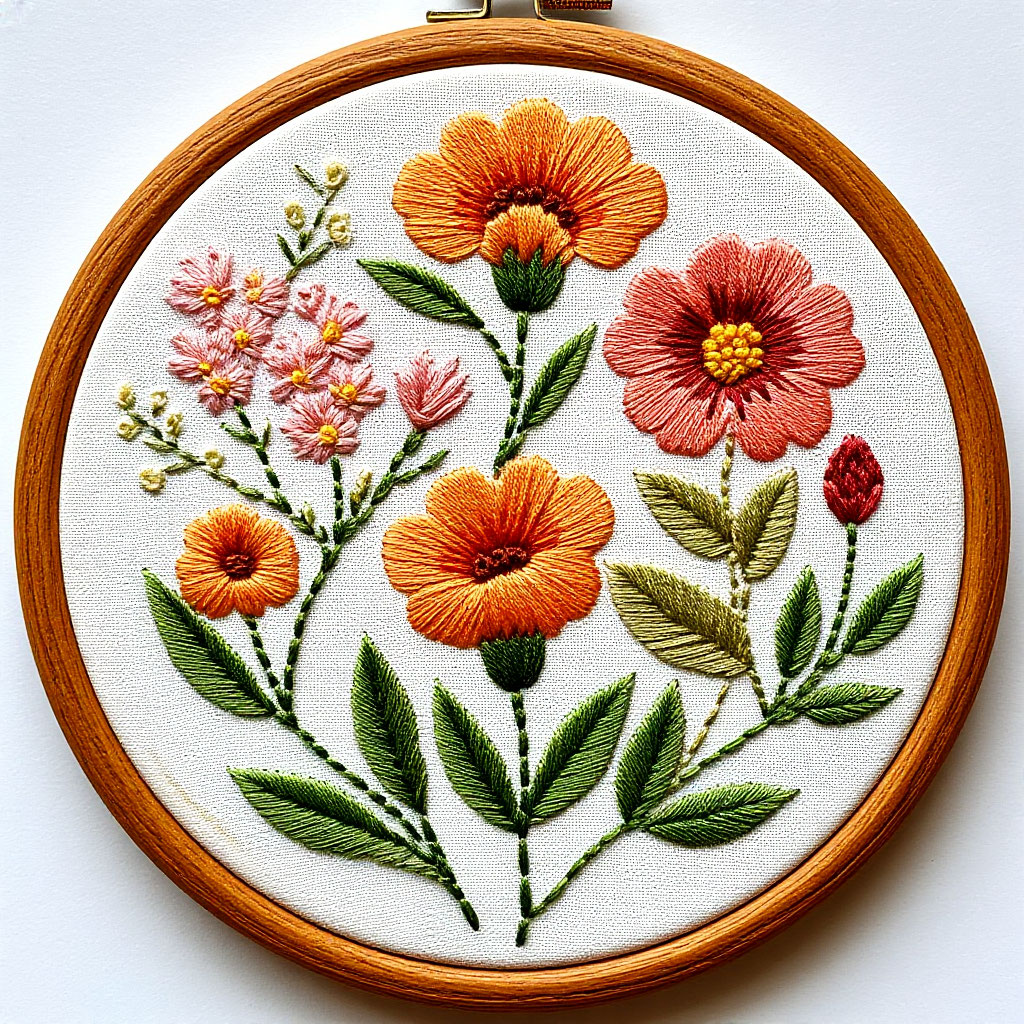
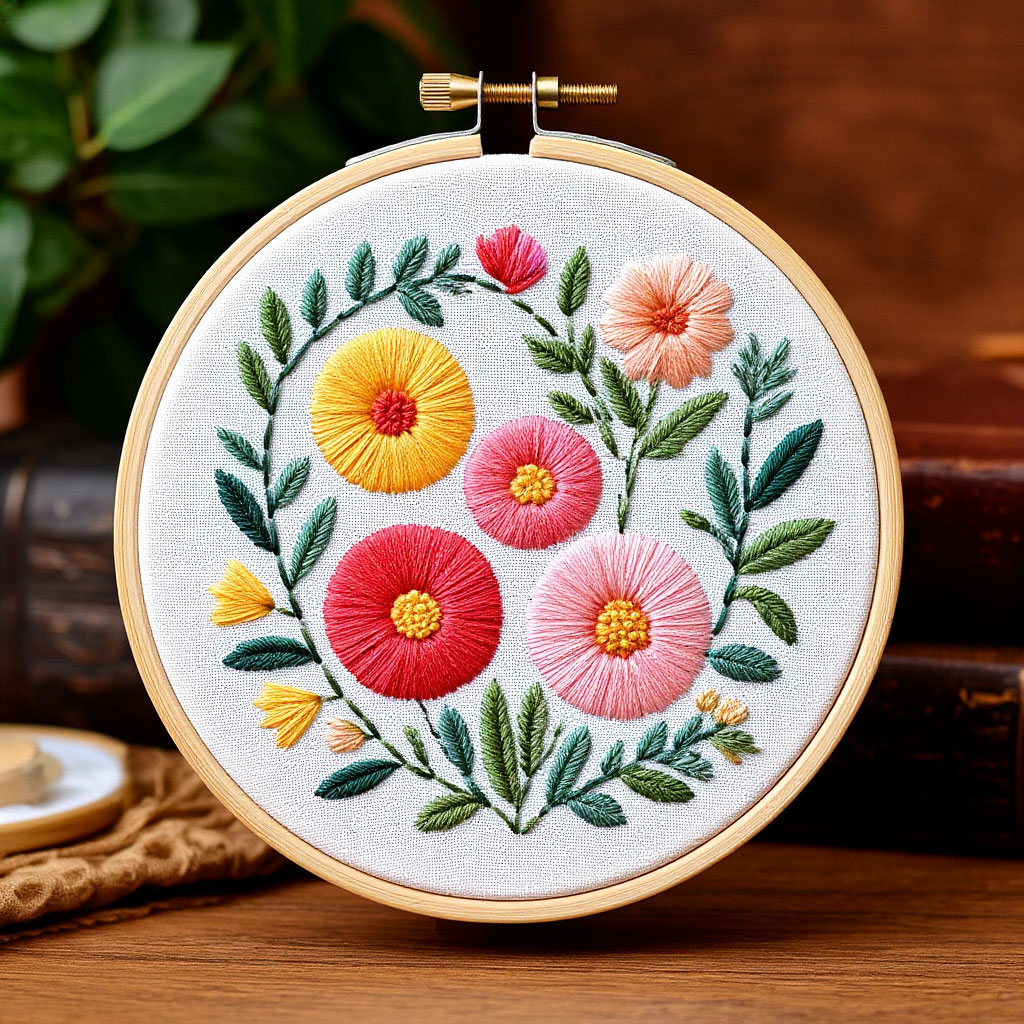
Flower Hoops for Decorative Touches
Flower patterns are perfect for embroidery for beginners. These projects teach several types of stitches, allowing you to create beautiful work.
Basic Flower Design
Start with simple daisy designs, using the lazy daisy technique for the petals. Add French knots in the center for texture. When learning to transfer embroidery patterns, floral designs provide great practice, as their organic shapes are forgiving of minor imperfections.
Creating a Bouquet
Group three to five flowers into a small hoop (6 inches in diameter works well). Use the best beginner fabric with a medium weave to support multiple stitch types. Mix up your flowers by mixing up different basic embroidery stitches – try roses with satin stitch petals along with daisies made with lazy daisy.
Everyday items with embroidered accents
Hands-on projects keep embroidery fun for beginners by creating finished pieces that are ready to use.
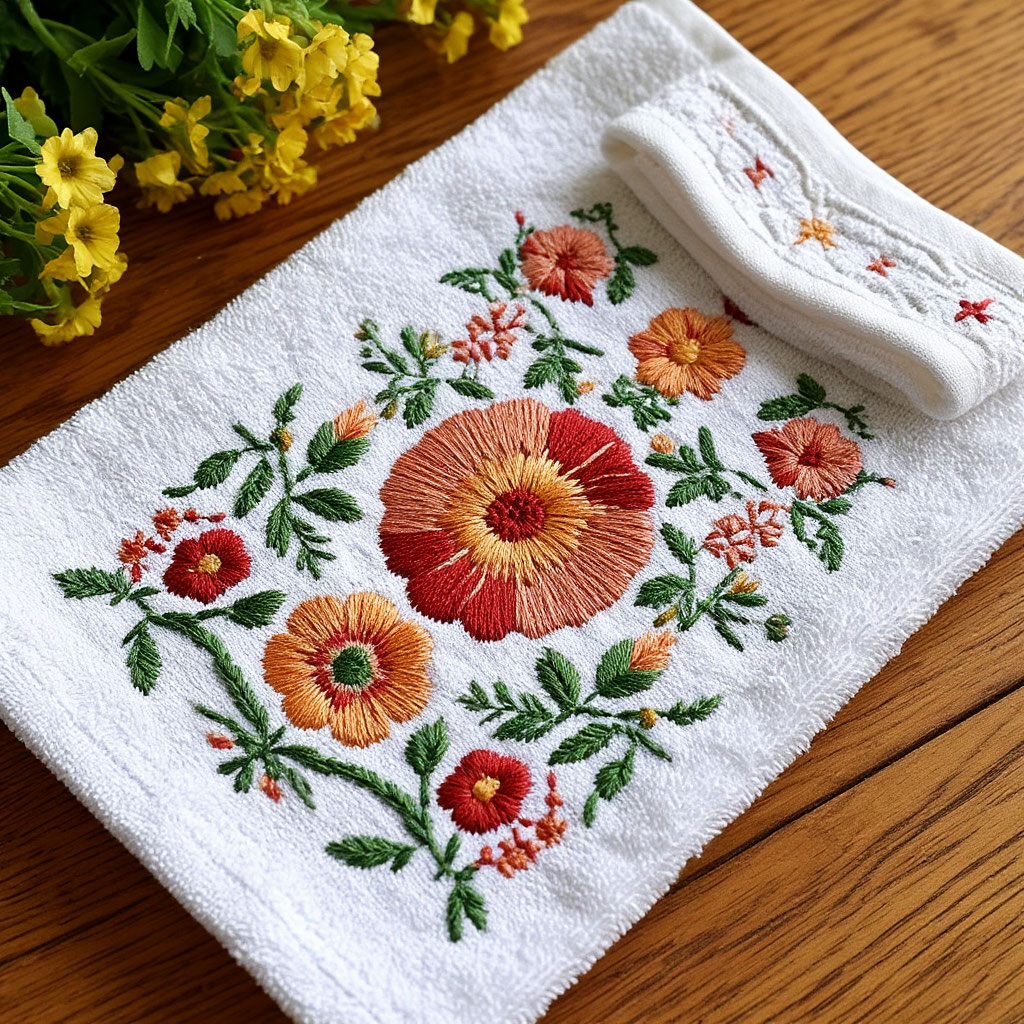
Decorating Kitchen Towels
Cotton kitchen towels make perfect practice canvases. Embroider a simple sprig of grass in one corner, using a backstitch for the stems and lazy daisy for the leaves. The best fabric for beginners in this case is pre-washed cotton to prevent shrinkage issues later on.
Personalizing Tote Bags
Durable canvas tote bags take embroidery beautifully. Transfer a small geometric pattern near the handle using basic embroidery stitches like the running stitch for the border. Beginner embroidery kits often include pre-marked tote bag projects for an easy start.
Seasonal Embellishments for Timely Practice
Holiday-themed projects are a great introduction to embroidery for beginners, as they are time-limited.
Christmas Ornaments
Felt is the best fabric for beginners making holiday ornaments. Embroider simple snowflakes using the backstitch or create tiny wreaths with French knot berries. These small projects build skills while creating ornaments you’ll treasure for years to come.
Fall Leaf Garland
Practice transferring embroidery patterns by tracing different leaf shapes onto fabric. Use satin stitch to fill in the maple leaves and running stitch for the veins. Sew finished leaves together for a seasonal decor that showcases your progress in a mastered craft using basic embroidery stitches.
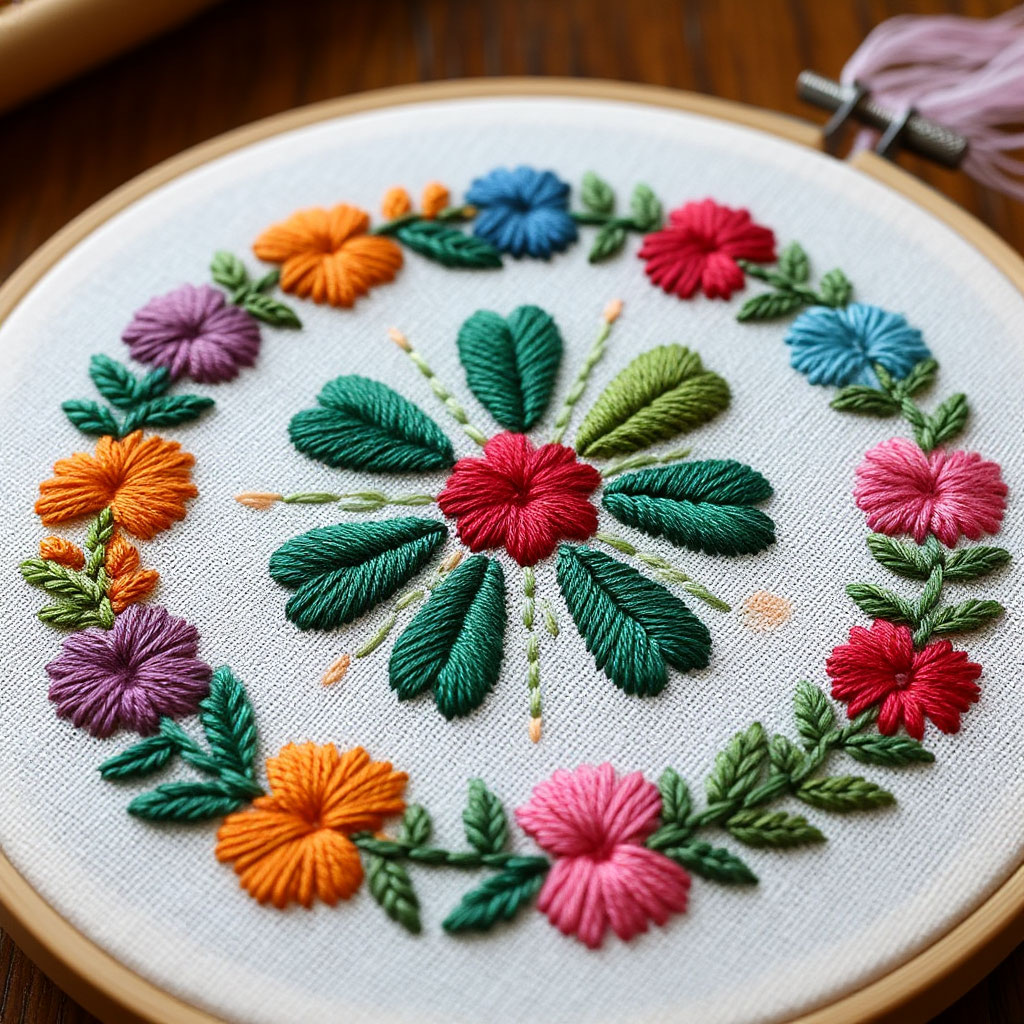
Tracking Progress with Sampler Projects
A stitch sampler remains one of the most valuable embroidery kits for beginners to develop your skills.
Creating Your Sampler
Divide an 8×10 inch piece of your best beginner fabric into sections. Label each area with a different basic embroidery stitch. This sampler will serve as both a practice project and a visual guide to improving your technique.
Incorporating Patterns
As your skills develop, add simple motifs between stitch samples. Practice transferring embroidery patterns by adding a small floral element or geometric border to your evolving sampler.
The perfect embroidery projects for beginners combine simple designs with beautiful results. From monograms to seasonal embellishments, these ideas build confidence in basic embroidery stitches while producing satisfying results. Quality embroidery kits for beginners provide great starting points, and learning how to transfer embroidery patterns opens up endless creative possibilities.
How to Set Up Your First Embroidery Hoop
Setting up your embroidery hoop correctly is essential for beginner embroidery because it will determine the quality of your stitches and your overall enjoyment of the project.
Embroidery hoops serve as a work surface and a means of maintaining tension, making the choice an important one when starting out with beginner embroidery.
Choosing Hoop Materials
- Plastic hoops are easy to access and work with, making them ideal for beginner embroidery kits.
- Wooden hoops provide excellent tension control, especially when working with the best beginner fabrics, like cotton or linen.
Consider starting with a 6-inch hoop, which is large enough for practice but still manageable for your first projects.
Matching the Hoop Size to the Design
When learning to transfer embroidery patterns, make sure your hoop can accommodate the entire design plus 2 inches of space for borders. For sampler projects using basic embroidery stitches, 8-inch types provide a comfortable amount of space for stitching.
Preparing the Fabric for Work
Proper fabric preparation can mean the difference between successful projects and frustrations in beginner embroidery.
Selecting and Preparing the Fabric
The best fabric for beginners should be heavyweight but soft. Pre-wash the fabric to prevent shrinkage later, especially when using beginner embroidery kits with included materials. Iron the fabric to remove wrinkles before hooping—wrinkles will distort stitches and make it difficult to transfer the design.
Cut the fabric at least 4 inches larger than the hoop diameter. Center the design area, keeping in mind how to transfer embroidery designs efficiently. For patterned fabrics, make sure the design is straight relative to the hoop orientation.
Step-by-Step Hoop Assembly
Correct assembly technique ensures proper fabric tension throughout your embroidery for beginners project.
Separating Hoop Components
- Loosen screw completely and separate rings
- Place inner ring on flat surface
- Lay fabric over it, centering design area
- Fit outer ring snugly over inner ring
Achieving Perfect Tension
- Press outer ring down evenly while keeping fabric taut
- Fabric should resemble a drumhead when tapped
- Make final adjustments after partially securing screw
Maintaining Tension During Stitching
Keeping consistent hoop tension separates quality work in embroidery for beginners.
Periodic Tension Checks
- Re-tighten screw slightly every 30 minutes
- Especially important for basic embroidery stitches like satin stitch
- Prevents puckering and uneven stitches
Hoop Rotation Techniques
- Rotate periodically to prevent creases
- Gives hands fresh areas to grip
- Particularly useful for lengthy beginner embroidery kits projects
Troubleshooting Common Hoop Problems
Even with quality beginner supplies, embroidery for beginners can sometimes lead to hoop-related problems.
Troubleshooting Loose Fabric
If your fabric slips while you sew, remove the hoop completely and start over. Lightly dampen your best beginner fabric to improve adhesion. If you have persistent problems, try adding a layer of stabilizer underneath the fabric.
Preventing Hoop Marks
Remove your work from the hoop when you are not sewing to prevent permanent creases. When working with delicate fabrics in beginner embroidery kits, wrap the edges of the hoop with bias binding for added protection.
!Alternatives to Traditional Hoops
While traditional hoops work well for most basic embroidery stitches, beginners should be aware of other options.
Learning How to Set Up a Spring-Tension Hoop
These one-piece hoops offer quick setup, perfect for transferring embroidery designs multiple times. Their consistent tension helps with satin stitch and other filling techniques.
Using Q-Snaps for Large Projects
When moving beyond beginner embroidery kits, these rectangular frames handle large designs while maintaining even tension on the best beginner fabric.
Mastering your hoop setup turns beginner embroidery from a frustrating experience into an enjoyable one. Remember that quality beginner embroidery kits often include the perfect-sized hoop for the design on your project. As you practice basic embroidery stitches, you’ll develop a feel for the perfect tension. Always test your setup by making a few test stitches before attempting a real project. With these techniques you will create the perfect basis for all your embroidery work, whether you are following transferred embroidery patterns or developing original pieces.
Tips for Keeping Your Stitches Neat & Even
Mastering the stitch pattern is a common problem when starting out in embroidery. These pro tips will help beginners achieve perfect embroidery results.
Understanding Correct Thread Tension
The foundation of quality embroidery is maintaining a balanced tension. Beginners often encounter stitches that are either too tight or too loose. Ideal tension allows the threads to lie flat on the fabric without distortion. When working on your first projects, aim for a moderate tension that allows the thread to move freely without sagging or pulling on the fabric.
Choosing the Right Needle
Needle selection affects the quality of your stitch. For most basic stitches on standard cotton or linen fabrics, a size 7 or 8 embroidery needle will work well. The eye should accommodate your thread without causing fraying. Remember that larger needles create more visible holes, which can affect delicate designs on finer materials.
Managing Thread Length
Correct thread length prevents common frustrations. Limit threads to about 18 inches. Longer threads tend to tangle, while shorter ones require constant rethreading. Let the needle hang freely periodically to allow natural unwinding as you work.
Stabilize Fabric
Good fabric support ensures the accuracy of each stitch. Even when working with quality beginner fabrics, additional stabilization helps with certain techniques. Place your non-dominant hand under the hoop to support the material as you stitch, especially when working with filled areas or detailed patterns.
Maintain Consistent Stitch Direction
Consistency in stitch direction improves professional results. Whether you’re following patterns or creating original designs, stitch in the same consistent direction. This attention to detail creates visual harmony throughout your project.
Optimize Your Workspace Setup
Proper lighting improves results. Provide bright, direct light on your work area so you can see each stitch clearly. Position the hoop at a comfortable angle that allows you to easily view both the front and back surfaces to check tension.
Developing Skills Through Practice
Regular practice remains an effective way to improve. Devote focused sessions to mastering individual stitches before combining them into projects. Many introductory kits include practice fabric to help you develop your skills.
Troubleshooting Common Problems
With proper technique, imperfections sometimes occur. For loose stitches, increase the tension slightly. If the fabric is wrinkling, decrease the tension and do not pull too tightly. Remember that some imperfections become less noticeable in finished designs.
Tracking Your Progress
Recording your improvements helps keep you motivated. Create a swatch using quality fabric, labeling each section with dates and stitch types. Return to basic stitches periodically to monitor your progress and improve your techniques.
Below is a short video on embroidery for beginners, covering basic materials and starting stitches. It’s a great way to watch it before you finish your project.
FAQ
Can embroidered clothes go in the washing machine?
Yes. Turn the garment inside out, place it in a mesh bag, and use a cold, delicate cycle; then air-dry flat. Avoid bleach and high heat to prevent distortion or puckering.
Will embroidery floss bleed on fabric?
Sometimes. Most DMC cotton floss is marketed as colorfast, but deep reds and darks can still tint when wet. Test with a damp white cloth first and use a color catcher if worried.
Can I bring hand embroidery needles and small scissors in my carry-on in the U.S.?
Yes. Sewing needles are allowed, and scissors are fine if blades are under 4 inches from the pivot. Pack sharp items safely; officers have final discretion.
How much does a beginner embroidery kit cost in the U.S., really?
Plan on about $12–$30 for a starter kit, $3–$10 for a 6″ hoop, and roughly $0.79 per DMC skein. Prices vary by retailer and sales.
What’s the easiest way to transfer an embroidery pattern onto dark fabric without a lightbox?
Use white carbon paper or a water-soluble “stick-and-stitch” stabilizer; both show up on dark fabric and wash away after stitching. Chalk/gel pens can refine lines
Achieving consistent stitches transforms the learning process. Start with well-designed introductory projects that provide appropriate materials. Be patient as you develop muscle memory for the various techniques. Even experienced embroiderers continually improve their skills, and deliberate practice will show noticeable improvement over time. You can now download a beginner’s embroidery checklist — a practical tool to help you practice stitches, track progress, and build confidence as you create.